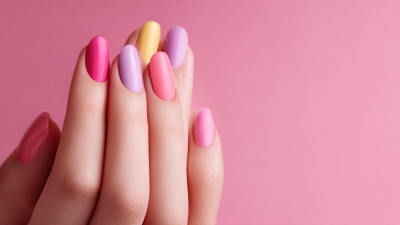
How to Apply Nail Gel Polish for a Perfect Salon Finish?
Achieving a perfect salon finish with Nail Gel Polish can seem daunting. Many people struggle with application techniques, leading to uneven results. However, mastering this skill is possible with practice and attention to detail.
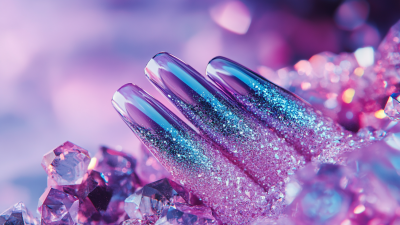
Nail Gel Polish offers longevity and shine, making it a popular choice. Yet, applying it correctly is crucial to avoid common pitfalls. A thick layer can lead to smudges and quick chipping. Conversely, too thin a layer might result in uneven coverage. Achieving that salon-quality look requires both patience and the right approach.
Understanding the tools you need is equally important. Quality base coats and top coats play significant roles. Using proper lighting during application can noticeably impact your results. While it may take some time to refine your technique, the satisfaction of a perfect manicure is worth the effort. Embrace the learning process; it's all part of becoming skilled with Nail Gel Polish.

Essential Tools and Products for Nail Gel Polish Application
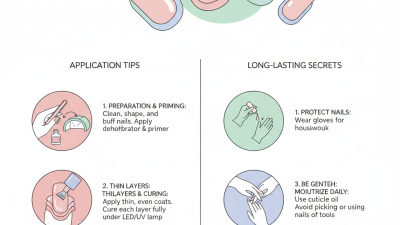
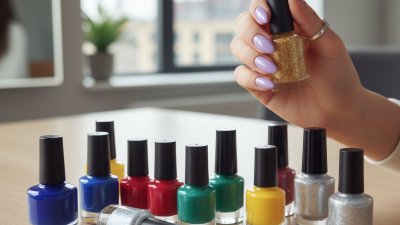
Applying nail gel polish requires the right tools and products. You’ll need a base coat, gel polish, and a top coat. A UV or LED lamp is essential for curing the gel. Ensure the lamp is compatible with your polish. You may also want a nail file, buffer, and cuticle oil. These items help prepare your nails and enhance the finish.
Once you have your tools, prep is crucial. Clean your nails. Remove any old polish and push back cuticles gently. This step makes a significant difference in the final look. For a neater application, use a thin brush for precision when painting the polish. It’s common to accidentally apply too much polish. If this happens, don’t be disheartened. Wipe excess off with a cotton swab.
Curing might seem straightforward, but timing is vital. Too short, and the polish won't set properly; too long, and you risk damage. After curing, apply the top coat for shine. Reflect on your technique and aim for improvement. Practice makes perfect in achieving that salon finish you desire.
Step-by-Step Nail Preparation for Gel Polish
Preparing your nails properly is crucial for achieving a flawless gel polish finish. Start by gathering all your tools. You'll need a nail file, cuticle pusher, buffer, and rubbing alcohol. First, clean your nails thoroughly. Remove any old polish and wash your hands. This step eliminates dirt and oil.
Next, shape your nails using a file. Opt for a shape that complements your hands. Then, gently push back your cuticles. Use a cuticle remover if necessary. Avoid cutting your cuticles, as this can lead to infection. Buff the nail surface to create a smooth canvas for the gel. This helps the polish adhere better.
After you’ve prepped your nails, increase your focus. Ensure they're completely dry before applying any product. Wipe each nail with alcohol. This removes residue and oils. Rushing through the preparation can lead to chipping or peeling. Pay close attention to details for the best results. Proper nail preparation is essential for that perfect salon finish.
Techniques for Applying Gel Polish Evenly and Smoothly
Achieving a perfect salon finish with gel polish requires attention to detail and technique. Start by ensuring your nails are clean and dry. Use a nail file to shape your nails, which can also help the polish adhere better. Avoid over-filing, as this can weaken your nails. Push back your cuticles gently, but make sure not to damage the nail bed.
When applying gel polish, use thin layers. Thick layers often lead to uneven surfaces and bubbling. Begin at the cuticle and gently brush upward. This technique helps create a smooth finish. If you notice any spots where the polish has pooled or hasn’t adhered well, take a moment to reflect on your application. Fixing these small issues can lead to a more professional look.
As you cure each layer under the UV light, watch for any imperfections. If you see any, consider adjusting your technique for the next coat. For the final layer, ensure the polish is even and smooth. Sometimes, the best results come from practicing patience and making small adjustments. Remember, no application is perfect on the first try. Embrace the learning process; it leads to improvement.
Application Techniques for Nail Gel Polish
Tips for Curing Gel Polish to Achieve a Long-Lasting Finish
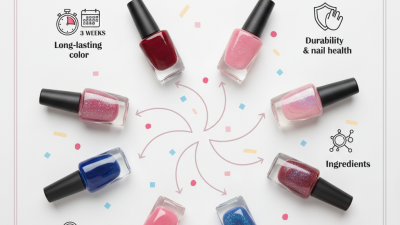
Curing gel polish properly is crucial for achieving a long-lasting manicure. Research shows that improper curing can reduce the polish's durability by up to 50%. To avoid this, ensure the lamp used is of high quality and matches the gel formula. UV and LED lamps have different curing times. Typically, LED lamps cure gel polish in about 30 seconds, while UV lamps may take up to two minutes.
Before curing, the nail surface must be clean and free of oils. A dehydrator can help, as industry studies indicate that prepping nails enhances adherence and longevity. Applying thin layers of polish is essential. Thick layers can lead to incomplete curing, resulting in chipping. Proprietary data suggests that nails treated with thinner layers not only last longer but also provide a shinier finish.
Improper application techniques are common pitfalls among beginners. Not waiting between coats can lead to an uneven finish. Additionally, many overlook the importance of sealing the tips of the nails. Failure to do so can result in premature wear. Reflecting on these methods can lead to improvements. Each application is a learning opportunity, and adjusting your technique over time can yield better results.
Finishing Touches: Top Coats and Nail Care Post-Application
To achieve that salon-perfect finish with nail gel polish, the finishing touches matter immensely. A quality top coat can seal your polish, providing a glossy look. It's essential to apply at least two layers for durability. When applying the top coat, ensure you cover the entire nail surface, including the tips. This extra step will help prevent chipping and enhance the gel's lifespan.
After your nails are beautifully polished, don't forget about post-application care. Allow your nails to cure under a UV light to set the polish correctly. You might feel tempted to rush, but taking your time is crucial. Always keep cuticle oil handy to nourish your nails and cuticles. This simple step can prevent dryness and cracking, giving a healthier appearance to your hands.
Tips: Clean your nails with alcohol before polish application. It removes oils and enhances adhesion. If you notice any uneven patches, don’t hesitate to smooth them out with a gentle file. A little effort can make a significant difference, even if it requires more work to perfect. Regular maintenance and mindful care can help you enjoy your manicure longer.
How to Apply Nail Gel Polish for a Perfect Salon Finish? - Finishing Touches: Top Coats and Nail Care Post-Application
| Step |
Description |
Tips |
| 1 |
Prep your nails by cleaning and soaking them to remove any dirt and oil. |
Use a gentle nail cleanser for best results. |
| 2 |
Apply a base coat to protect your nails and enhance adhesion. |
Allow the base coat to dry completely before applying gel polish. |
| 3 |
Apply the gel polish in thin layers, curing each layer under a UV or LED lamp. |
Three thin layers generally provide better finish than one thick layer. |
| 4 |
Finish with a top coat for added shine and durability. |
Seal the edges to prevent chipping. |
| 5 |
After curing, wipe off the sticky layer with a nail cleaner. |
This will reveal the shine of your finish. |
| 6 |
After the process, apply cuticle oil to moisturize your nails and cuticles. |
Daily application helps maintain nail health. |