Top Nail Gel Tips for Perfect Application and Long-Lasting Results?
When it comes to achieving perfect nail aesthetics, the right application of Nail Gel is crucial. Renowned nail artist, Emily Johnson, states, “A well-applied Nail Gel can redefine your look and boost your confidence.” Her expertise highlights that it's not just about the product; technique matters significantly.
Many enthusiasts rush through the application. They may not consider the importance of proper nail preparation or curing times. These factors can vastly affect durability and overall results. Nail Gel can chip easily if the steps are not followed accurately.
Moreover, maintaining nails post-application is vital. Daily activities can wear down the gel's shine and finish. Understanding the fine balance between application technique and care can lead to beautiful, long-lasting nails. Rushing or skipping steps could result in a less-than-perfect manicure.
Understanding Nail Gel Types for Optimal Application
Choosing the right nail gel is crucial for achieving a flawless manicure. There are various types of nail gels available. Each type has distinct characteristics. Understanding these can greatly enhance your application technique. For instance, hard gels provide strong protection but require careful application. Soft gels, on the other hand, are more flexible and easier to remove.
The method of application varies among gel types. For hard gels, a specific brush technique is necessary to ensure even coverage. It's common for beginners to struggle with this, leading to uneven layers. Soft gels often dry quicker, but this can be a double-edged sword. Rushing can result in bubbles or uneven surfaces, compromising the final look.
Experimenting with different gels will help identify your preferences. Don't be afraid to make mistakes during this process. Each application teaches something new. If application doesn’t go as planned, reflect on what could be improved next time. This journey involves learning about both the products and your own techniques. Patience is key for achieving that long-lasting, salon-quality finish.
Essential Tools Needed for a Flawless Nail Gel Experience
Achieving a flawless nail gel experience begins with the right tools. Invest in a high-quality nail lamp to ensure the gel cures properly. The right lamp can make a significant difference in the durability and shine of your nails. Be mindful that not all lamps work equally well with every gel product. So, research and select one compatible with your chosen gel.
A good set of nail brushes is also essential. Different brushes serve various purposes, from applying the base coat to intricate designs. A fine brush can help with details, while a flat brush is ideal for even application. Don't forget about a cuticle pusher and a buffer. These tools are vital for prepping your nails. Poor preparation can lead to chipping and peeling.
Finally, embrace a practice mindset. Expect some trial and error as you refine your technique. Your application may not always be perfect, and that's okay. Mistakes can teach you a lot about your preferences and areas for improvement. Take notes on what works and what doesn’t, and adjust your tool use accordingly. The goal is progress, not perfection.
Top Nail Gel Tips: Application Techniques and Results
Step-by-Step Guide to Preparing Your Nails Before Application
Preparing your nails before gel application is crucial for achieving beautiful results. Proper preparation can enhance adhesion and longevity. According to a report by the Nail Technology Association, poorly prepared nails can lead to peeling and chipping, affecting nearly 30% of gel manicures.
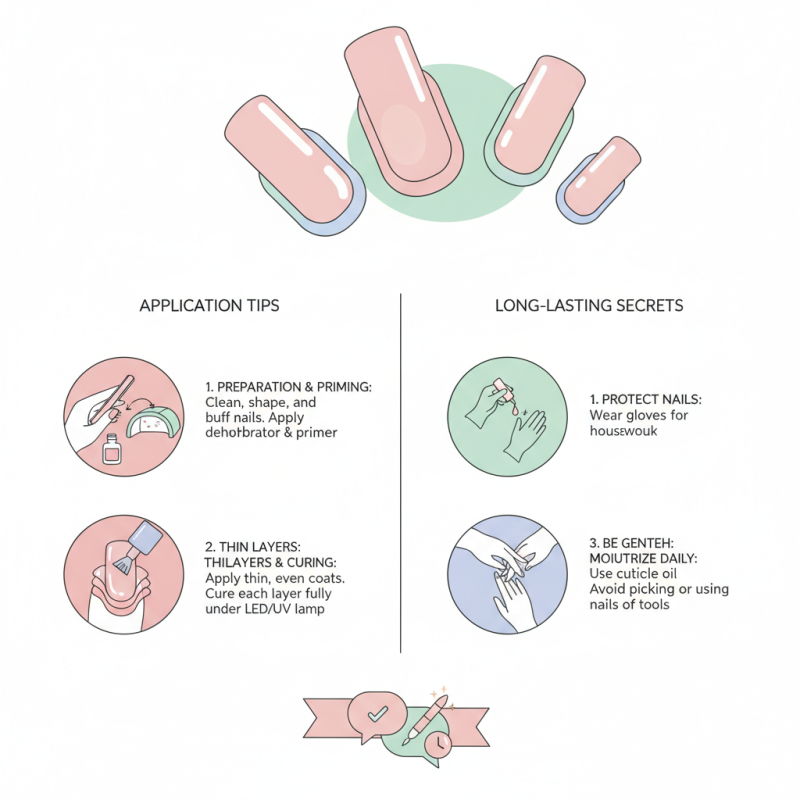
Start by removing old nail polish completely. Use an acetone-based remover for best results. After this step, file your nails to your desired shape. A good shape prevents snags. Clean your nails with soap and water to eliminate any debris. This ensures a clean surface for the gel to bond effectively.
Tips for perfect application:
- Use a buffer to gently roughen the nail surface. This can improve the gel's grip.
- Apply a base coat carefully. Avoid overloading the brush to prevent uneven results.
- When curing the gel, ensure it is properly dried under the UV or LED lamp. Remember, leaving gaps can lead to lifting and can ruin the overall appearance.
An estimated 20% of users report lifting issues due to application mistakes. Taking the time to perfect these steps will help in achieving long-lasting and flawless nails.
Best Techniques for Applying Nail Gel Smoothly and Evenly
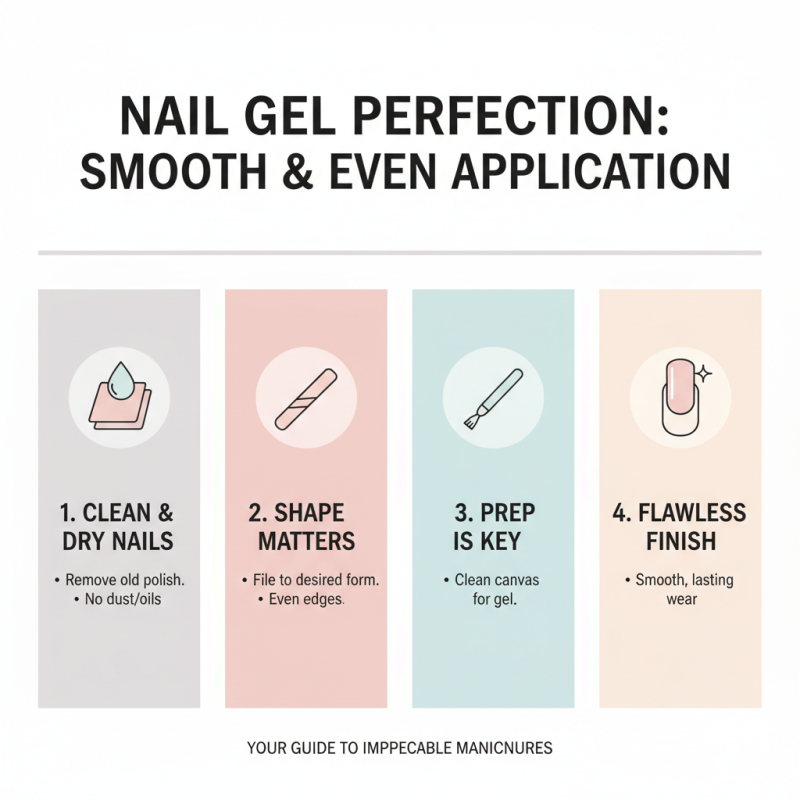
Applying nail gel smoothly and evenly requires practice and attention. Start with clean, dry nails. Remove any previous polish and ensure there’s no dust. Use a nail file to shape your nails perfectly. A clean canvas is essential for a flawless application.
When applying the gel, use thin layers. Thick layers can lead to uneven curing and lifting. Brush the gel onto the nail with a gentle hand. Avoid touching the cuticles. This helps create a professional look. If you find that gel pools near the cuticles, it’s a sign to adjust your technique.
Curing the gel under a lamp is just as crucial. Ensure the light penetrates the gel evenly on all sides. Sometimes, a rotation of the hand in the lamp can help. If you notice gaps, take a moment to refine your application. Remember, practice makes perfect. Don’t get discouraged if your first attempts aren’t ideal. Each application is a chance to improve your skills.
Tips for Ensuring Long-Lasting Wear and Maintenance of Nail Gel
To achieve long-lasting wear with nail gel, preparation is key. Start with clean, dry nails. This prevents lifting and allows the gel to adhere better. Buff the nail surface gently to create a smooth foundation. Pay close attention to the edges; gel often lifts from here. Consider using a base coat designed for gel applications.
After you apply the gel, ensure it’s cured properly under UV or LED light. The curing time affects durability significantly. A quick check during the process can save you from touch-ups later. For maintenance, use cuticle oil regularly. This helps keep the surrounding skin hydrated. You might forget, but neglecting this step can lead to flaking.
Sometimes, even with the best care, chipping happens. It’s frustrating but common. When this occurs, don’t panic. Instead, assess whether it’s a technique issue. Reflecting on your application process can help improve future results. Regular touch-ups are part of nail gel care. Embrace this routine for that perfect manicure look.
Top Nail Gel Tips for Perfect Application and Long-Lasting Results
| Tip |
Description |
Expected Results |
| Clean Nails |
Ensure nails are free of oils, dirt, and old polish before applying gel. |
Better adhesion of gel, leading to a longer-lasting manicure. |
| Base Coat Application |
Apply a thin layer of base coat for a smooth surface and to protect natural nails. |
Increased durability and prevents staining of the natural nail. |
| Thin Layers |
Apply gel in thin layers to allow proper curing between coats. |
Improved bonding and prevents bubbling or lifting. |
| Curing Time |
Ensure sufficient curing time under UV/LED lamp for each layer. |
Maximizes gel longevity and reduces chipping. |
| Top Coat Finish |
Seal the color with a top coat for added shine and protection. |
Enhances durability and maintains glossy appearance. |
| Moisturize Cuticles |
Use cuticle oil regularly to keep cuticles hydrated and healthy. |
Prevents peeling and enhances nail health for better gel longevity. |
| Avoid Water Exposure |
Limit exposure to water during the first 24 hours after application. |
Reduces risk of lifting and extending the life of the gel. |