Why Uv Gel is the Ultimate Choice for Brilliant Nail Art
In the ever-evolving world of nail art, UV gel has emerged as a game changer, revolutionizing the way enthusiasts and professionals approach nail design. According to a recent market report by Grand View Research, the global UV nail gel market is projected to reach $1.1 billion by 2025, reflecting a growing demand for long-lasting and visually stunning nail solutions.
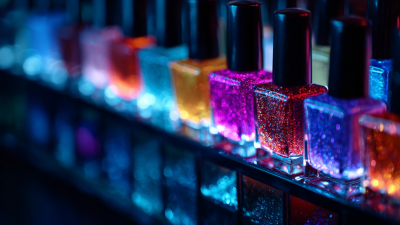
 UV gel offers unparalleled durability, can last up to three weeks without chipping, and comes in a myriad of colors and finishes, making it the ultimate choice for those seeking brilliance in their nail art. With its quick curing properties under UV light, nails can be transformed from dull to dazzling in less time than ever before. This introduction to UV gel will explore its benefits and techniques, guiding both novices and experts in creating breathtaking nail designs that stand out in a crowded beauty landscape.
The Advantages of UV Gel Over Traditional Nail Polishes
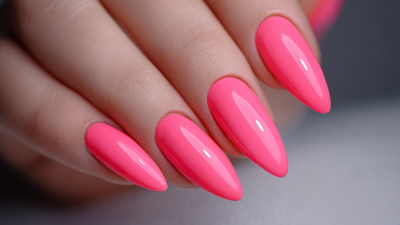
UV gel has emerged as a leading choice for nail art enthusiasts, largely due to its numerous advantages over traditional nail polishes. The durability of UV gel is one of its standout features. Unlike conventional polishes that chip and fade easily, UV gel provides a long-lasting finish that can withstand the rigors of daily life. Once cured under UV light, it forms a resilient layer that is less prone to wear and tear. This robustness not only enhances the nail art but also reduces the frequency of touch-ups, making it a practical option for busy individuals.
Furthermore, the growing market for UV stabilizers reflects the increasing appreciation for UV products across various sectors. According to market reports, the global UV stabilizer market is projected to reach $1.56 billion in 2024, with an anticipated rise to $2.41 billion by 2032. This growth indicates a broader acceptance of UV technology, not just in nail products but across coatings and plastics. As beauty trends evolve, the demand for UV gel nail art is expected to align with these market dynamics, highlighting its position as the ultimate choice for brilliant and enduring nail designs.
Essential Tools and Materials for UV Gel Nail Art
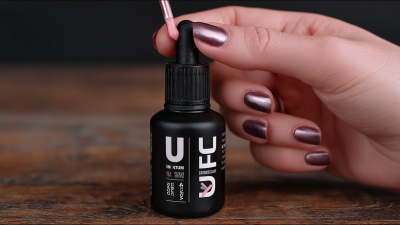
When it comes to creating stunning nail art, UV gel has emerged as the ultimate choice for enthusiasts and professionals alike. Essential tools and materials play a critical role in achieving that flawless finish. Key components include UV gel polish, a reliable UV lamp, base and top coats, and nail prep tools that ensure a smooth application. The right kit can simplify the process, even for those new to DIY gel manicures.
At-home gel nail kits have gained popularity due to their convenience and quality, allowing users to enjoy salon-grade results in the comfort of their homes. A well-rounded kit not only includes UV gel polish but also features items like nail files, cuticle pushers, and remover tools. With the right materials at hand, achieving a professional look becomes effortless, making UV gel nail art an appealing choice for those seeking creativity and style.
UV Gel Nail Art Popularity by Age Group
This chart displays the popularity of UV gel nail art across different age groups, highlighting that it is predominantly favored by younger individuals.
Step-by-Step Guide to Creating Stunning UV Gel Nail Designs
Creating stunning UV gel nail designs requires a systematic approach to achieve the best results. First, ensure that you start with clean, prepped nails. According to a report by Nail Tech HQ, proper nail preparation can increase the longevity of gel nail art by up to 30%. Begin by pushing back the cuticles and lightly buffing the surface of the nail to create an ideal foundation for the gel. This step not only enhances adhesion but also minimizes the risk of lifting.
Once the nails are ready, apply a base coat of UV gel and cure it under a UV lamp for the recommended time, typically 30 seconds to 2 minutes, depending on the brand. Follow this by layering your chosen colors and designs, using tools like fine brushes or dotting tools for intricate patterns. Interestingly, a survey by the International Nail Association revealed that consumers are increasingly favoring UV gel nails due to their durability, with 85% stating that gel nails last longer than traditional polish. By finishing with a top coat and curing it, you seal the design, ensuring that your nail art remains brilliant and chip-free for weeks.
Why Uv Gel is the Ultimate Choice for Brilliant Nail Art - Step-by-Step Guide to Creating Stunning UV Gel Nail Designs
| Step |
Description |
Time Required |
Difficulty Level |
| 1 |
Prepare your nails by cleaning and filing them. |
10 minutes |
Easy |
| 2 |
Apply a base coat of UV gel and cure it under a UV lamp. |
2 minutes |
Moderate |
| 3 |
Choose your desired UV gel colors and design. |
5 minutes |
Easy |
| 4 |
Apply colored UV gel in layers and cure each layer. |
15 minutes |
Moderate |
| 5 |
Add top coat and cure for a glossy finish. |
2 minutes |
Easy |
| 6 |
Clean off any sticky residue with alcohol. |
5 minutes |
Easy |
Tips for Maintaining and Caring for Your UV Gel Nails
UV gel nails have gained immense popularity due to their stunning finish and durability. To maintain the health of your UV gel nails, it’s crucial to adopt a good care routine. Regular moisturizing is essential; keep your cuticles hydrated with oils to prevent dryness and cracking. Additionally, be aware of the removal process. If not done properly, it can leave your natural nails weak and vulnerable. Instead of peeling off the gel, opt for soaking techniques that incorporate a nourishing treatment to recover your nails after removal.
When considering at-home UV gel nail kits, safety and proper usage are paramount. Ensure you follow the instructions meticulously to avoid potential damage. Invest in a quality UV lamp and don't skip on base and top coats, as they provide essential protection and enhance the longevity of your manicure. Remember, always keep an eye on your nails for any signs of damage or irritation, and don’t hesitate to give them a break from gels to strengthen them with specialized treatments. These tips will help keep your nails looking their best while enjoying the aesthetic of UV gel nail art.

Common Mistakes to Avoid When Working with UV Gel
When working with UV gel for nail art, avoiding common mistakes can significantly enhance the quality and longevity of your designs. One prevalent error is improper curing of the UV gel. According to a report by the Professional Beauty Association, over 50% of nail technicians encounter issues such as bubbling or lifting due to insufficient curing. This emphasizes the necessity for proper exposure time under the UV lamp, as each gel product is formulated differently and may require specific curing durations to achieve optimal hardness and shine.
Another common mistake is neglecting nail preparation. A study published in the Journal of Cosmetic Dermatology indicates that poorly prepped nails can lead to premature lifting and chipping, with nearly 35% of clients experiencing dissatisfaction related to nail longevity. Properly cleaning, buffing, and dehydrating the natural nail surface creates the ideal foundation for UV gel application. Additionally, technicians should be mindful of the thickness of their gel layers; overly thick applications can lead to uneven curing and an unsatisfactory finish, compromising both aesthetics and durability. By addressing these pitfalls, nail artists can ensure their UV gel creations are not only beautiful but also long-lasting.