Leave Your Message

What Is a Nail Gel Polish Set and How Does It Work?

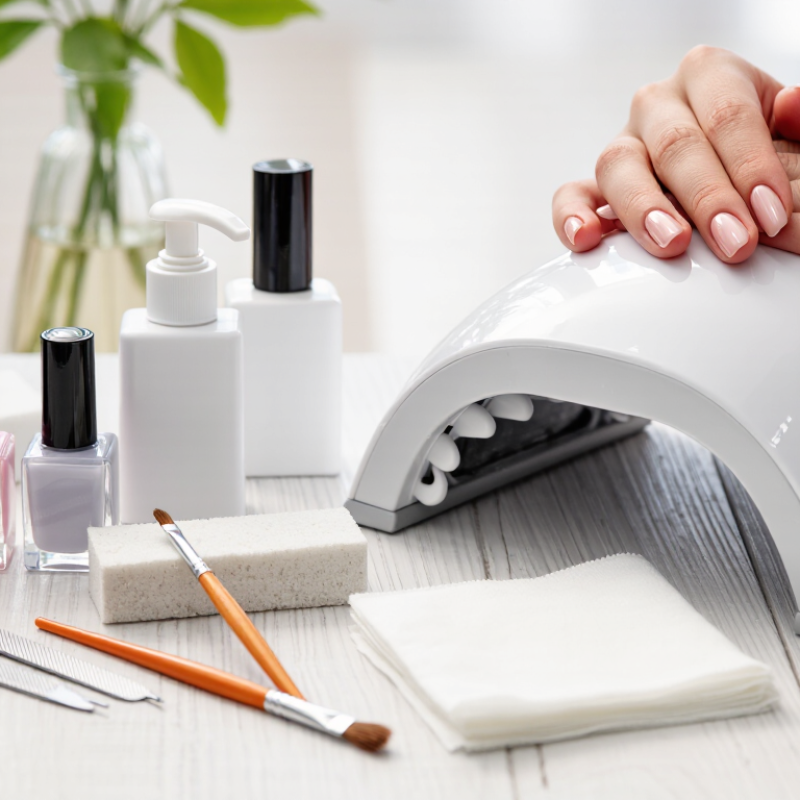
A Nail Gel Polish Set is a home manicure system designed for durable, glossy color. It usually includes gel base coat, colored gel polish, and top coat. Many sets also provide a UV or LED lamp, nail file, buffer, cleanser, and removal tools. Each item supports a different stage of the manicure.

The process begins with clean, dry nails and gently shaped edges. A thin base layer helps the color adhere more evenly. The lamp then cures the gel by hardening its light-sensitive ingredients. Thin color coats usually cure more reliably than thick ones. The top coat adds shine and helps protect the surface from scratches. Do not rush this step.

From practical use, curing time depends on the lamp’s power, wavelength, product formula, and coat thickness. The instructions supplied with the set deserve careful attention. A soft or wrinkled finish may indicate incomplete curing, excess product, or an incompatible lamp. That mistake is easy to make. Gel polish should not touch the surrounding skin, because repeated contact may increase irritation or allergy risk. Good ventilation, clean tools, and patient removal also matter. Peeling the product away can damage the natural nail, even when the manicure looks ready to remove. Results are not always perfect. Nail condition, application technique, and product quality can change the experience. Understanding how the system works makes the Nail Gel Polish Set more predictable, safer to use, and easier to evaluate.
What Is a Nail Gel Polish Set and How Does It Work?

What Is a Nail Gel Polish Set?

A nail gel polish set is a home manicure kit designed to create a cured, glossy finish. Unlike regular polish, gel polish hardens under an LED or UV lamp. Most sets include a base gel, color gel, top gel, curing lamp, nail file, buffer, and cleaning wipes. Some also contain cuticle tools, clips, or removal wraps.

The process begins with clean, dry nails. Lightly shaping the edges helps the product sit evenly. A thin base layer protects the natural nail and improves adhesion. After curing it under the lamp, apply a very thin color coat. Thick layers may wrinkle or remain soft inside. Cure each layer for the time stated in the instructions. Finish with the top gel, then wipe away any tacky residue if required.

In practical use, preparation often matters more than the color. Oil left near the cuticle can cause early lifting. Gel touching the skin may increase irritation risk, so it should be removed before curing. Good ventilation and careful timing also matter. The lamp must match the gel’s curing requirements; appearance alone cannot confirm full curing. The set feels simple, but it is not foolproof. A rushed application can damage the nail surface during removal. Soak-off removal should be gradual, never forced or peeled away. Results can vary, and that is worth remembering.

What Is a Nail Gel Polish Set and How Does It Work? - What Is a Nail Gel Polish Set?

Data Dimension Typical Information How It Works or Why It Matters
Definition A nail gel polish set is a group of products used to prepare, color, cure, protect, and remove gel polish from natural or artificial nails. The products are designed to work as a system, with each layer contributing to adhesion, color, durability, or shine.
Common Set Components Base coat, gel color, top coat, LED or UV lamp, nail file, buffer, cuticle pusher, lint-free wipes, and gel remover or acetone wraps. The exact contents vary, but a complete set normally includes the essential application and removal tools.
Base Coat A thin, transparent or lightly tinted layer applied directly to the prepared nail. It helps the color layer adhere to the nail and can reduce staining from highly pigmented shades.
Gel Color A pigmented gel product usually applied in two or more thin coats. Thin coats cure more evenly and help prevent wrinkling, lifting, or an under-cured center.
Top Coat A clear protective layer available in glossy, matte, or specialty finishes. It seals the color, adds surface protection, and improves resistance to chips and loss of shine.
Curing Process Gel polish is cured under an LED or UV/LED lamp rather than air-dried. Light activates photoinitiators in the gel, causing the liquid polymers to cross-link into a hard coating.
Typical Curing Time Approximately 30–60 seconds per layer under many LED or UV/LED lamps; some formulas require longer. The required time depends on the formula, layer thickness, lamp wavelength, and lamp power. The product instructions should take priority.
Application Sequence Shape and clean nails, prepare the cuticle area, apply the base coat, apply color coats, apply the top coat, and cure each required layer. Following the sequence helps create a smooth, bonded coating and reduces premature peeling.
Expected Wear Period Often about 2–3 weeks when applied correctly and maintained properly. Wear time is affected by nail preparation, product compatibility, nail growth, water exposure, and daily activities.
Removal Method The surface is lightly filed, then the gel is softened with acetone and gently removed after soaking. Peeling or forcibly scraping cured gel can remove layers of the natural nail and increase brittleness.
Finish Characteristics Gel polish typically provides a smooth surface, strong color saturation, and a durable glossy or matte finish. The cured coating is more resistant to smudging than traditional air-dry polish once the final layer is properly cured.
Safety Consideration Avoid skin contact with uncured gel, use adequate ventilation, and follow the lamp and product instructions. Uncured ingredients may cause irritation or sensitization in some users, while incorrect curing can leave residual uncured material.
Best Use Case Suitable for users who want longer-lasting color and a salon-style finish at home or in a professional setting. The system is most effective when thin layers, clean nail preparation, complete curing, and careful removal are used together.

What Products and Tools Does a Gel Polish Set Include?

A nail gel polish set is a small curing system, not simply a box of colored bottles. In a typical home setup, it includes a base coat, gel color, and glossy or matte top coat. The base improves adhesion. The color supplies coverage. The top coat protects the surface and controls shine. Each layer needs curing under an LED or UV lamp. Most lamps use 365 or 405 nanometer wavelengths, but curing time depends on the formula and lamp power.

The useful tools are just as important. A set may contain a nail file, buffer, cuticle pusher, lint-free wipes, cleanser, and removal clips or foil wraps. Some sets include a small brush for edge cleanup. That detail matters because flooded cuticles can cause lifting and skin irritation.

I once assumed a stronger lamp always worked better. It did not. A thick color layer cured unevenly and remained soft underneath. Thin coats usually give more reliable results. Gloves and ventilation are sensible additions, even when they are not included.

Market data helps explain this set’s popularity. Grand View Research valued the global nail polish market at about USD 14.6 billion in 2023 and projected growth through 2030. Allied Market Research estimated the nail polish market could reach roughly USD 22.1 billion by 2031. These reports cover wider nail products, not gel sets alone. Still, they show rising interest in at-home nail care. The weak point is user consistency. Skipping cleanser, overloading the brush, or guessing cure times can undermine an otherwise professional-looking kit.

How Does Gel Polish Cure Under LED or UV Light?

A nail gel polish set usually includes a gel color, base coat, top coat, and curing lamp. Unlike regular polish, gel contains photoinitiators. These chemicals react when exposed to specific light wavelengths. The reaction changes the liquid gel into a firm polymer coating.

LED and UV lamps both emit ultraviolet light, usually within the UV-A range. The lamp activates the photoinitiators, starting the curing process from the surface through the layer. LED lamps often cure gel faster because their light targets a narrower wavelength range. UV lamps may take longer, depending on their bulb strength and age. A thin coat might cure in 30 to 60 seconds, but exact timing depends on the gel formula and lamp compatibility. The surface can feel slightly warm. That brief heat spike is normal, although sharp burning suggests removing the hand and checking the application.

Tips: Apply very thin layers and keep gel off the surrounding skin. Cure every layer for the recommended time, including the base and top coat. Wipe away mistakes before curing. Uncured gel may irritate skin, so careful application matters. I have found that thicker coats look attractive at first, but they often wrinkle or remain soft underneath. Timing is not universal. Lamp power, distance, and product chemistry can change the result, so following the set’s instructions remains the most reliable approach.

How to Apply Gel Polish Step by Step

A nail gel polish set usually includes gel color, base coat, top coat, a curing lamp, and preparation tools. Gel polish stays liquid until a UV or LED lamp cures it. The light hardens each thin layer, creating a glossy and more durable finish. Results depend on nail preparation, product instructions, and correct curing time.

Start with clean, dry nails. Push back the cuticles gently, then shape the edges with a fine file. Lightly remove surface shine with a buffer, but do not thin the natural nail. Brush away dust and wipe each nail with a suitable cleanser. Apply a very thin base coat, keeping it off the surrounding skin. Cap the free edge, then cure it according to the lamp instructions.

Now add a thin color layer. Cure it fully before applying another layer. Two thin coats usually look smoother than one thick coat. Apply the top coat, seal the edge again, and cure it. If the surface remains sticky, wipe it only when the instructions require this step. Avoid peeling cured gel from the nail, because it can remove natural layers too.

Keep the lamp clean and use it as directed. Skin contact may increase irritation or allergy risk, so remove spills before curing. Even careful users sometimes flood the cuticle or under-cure a layer. I still check the edges under bright light; small gaps are easy to miss. If burning, swelling, or persistent redness appears, stop using the product and seek professional medical advice.

What Is a Nail Gel Polish Set and How Does It Work?

A gel polish set usually includes a base coat, colored gel polish, top coat, and a UV or LED lamp. Each thin layer is cured under the lamp so photoinitiators in the gel form a hard, durable coating.

Typical curing times: Apply each layer thinly and cure it before adding the next one. The times shown are common starting points; always follow the instructions supplied with the specific gel and lamp.

How to Remove Gel Polish Safely and Maintain Nail Health

A nail gel polish set usually includes gel color, a base coat, a top coat, and a curing lamp. The lamp hardens each thin layer through light. Proper curing creates a smooth, durable finish, but thick coats can remain soft underneath. I have noticed that rushing this step often causes early lifting and peeling.

Safe removal begins with patience. File away the shiny top layer gently, without scraping the natural nail. Soak small cotton pieces in acetone, place them over each nail, and wrap the fingertips with foil for about 10 to 15 minutes. The softened gel should slide away with light pressure. Never pull or force it. If sections remain attached, repeat the soak briefly. Aggressive removal can thin the nail plate and leave it rough, sensitive, or painfully tender. A trained nail professional should assess persistent pain, swelling, discoloration, or separation. Home removal is convenient, but it is not always the best choice. I still sometimes underestimate how dry acetone can make the surrounding skin.

Tips: Apply petroleum jelly around the nails before soaking. Wash hands afterward, then use cuticle oil and a fragrance-free moisturizer. Keep nails short while they recover. Avoid buffing away stains or peeling layers. Give damaged nails time to grow, even when they look uneven. Clean tools before use, and never share them.