Mastering the Art of Gel Nail Polish Application for Stunning Results
The popularity of gel nail polish has skyrocketed in recent years, transforming the way both professionals and enthusiasts approach nail care and beauty. According to a report by Grand View Research, the global gel nail market is expected to reach approximately $9.57 billion by 2025, driven by the rising demand for long-lasting and high-gloss finishes. This revolutionary product offers not only durability but also a vast array of colors and techniques that can enhance the artistry of nail design. However, achieving stunning results with gel nail polish requires a mastery of application techniques. This tutorial will guide you through the essential steps and tips needed to perfect your gel manicure at home, ensuring you achieve salon-quality results without the hefty price tag. Whether you’re a novice or a seasoned nail artist, understanding the intricacies of gel nail polish application will elevate your nail game to new heights.
Essential Tools for Perfect Gel Nail Polish Application
When it comes to achieving a flawless gel nail polish application, having the right tools is crucial. An essential part of your toolkit should include a high-quality UV or LED lamp, which is designed to cure the gel polish quickly, ensuring that your manicure is both smudge-proof and long-lasting. These lamps are a game-changer, allowing you to achieve that salon-level finish without stepping out of your home. A good base coat is equally important, as it creates a smooth canvas for the color application and helps the gel polish adhere better, preventing chipping and peeling.
In addition to lamps and base coats, consider investing in a set of nail prep tools like file buffers and cuticle pushers. Proper nail preparation is key to a successful application; removing excess cuticle and ensuring the nail surface is smooth can dramatically improve the overall look of your manicure. With these essentials in hand, you can confidently explore various gel polish formulas and techniques to find what works best for you, ultimately crafting beautiful, salon-quality nails right from the comfort of your own home.
Step-by-Step Guide to Achieving a Flawless Gel Manicure
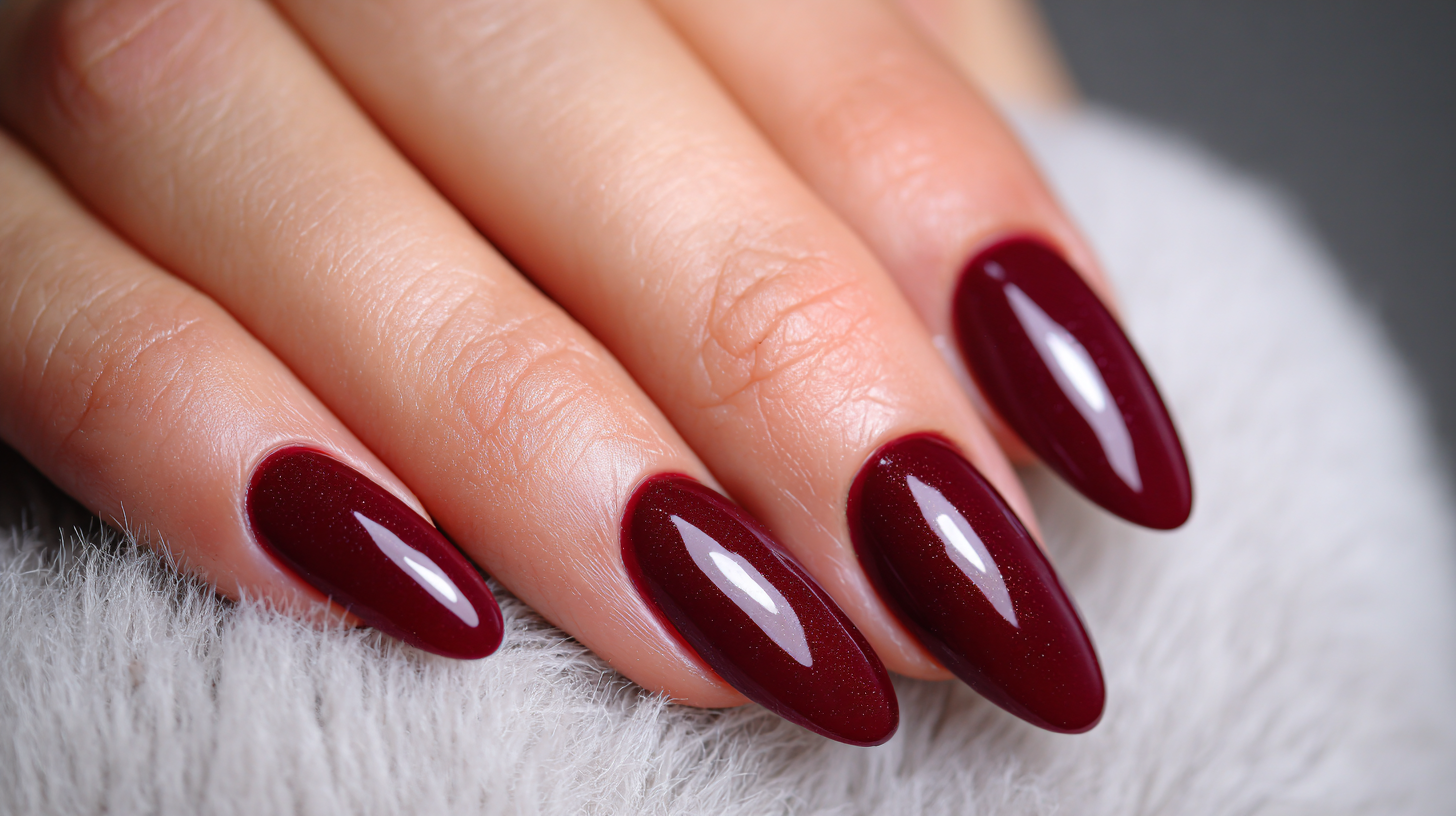
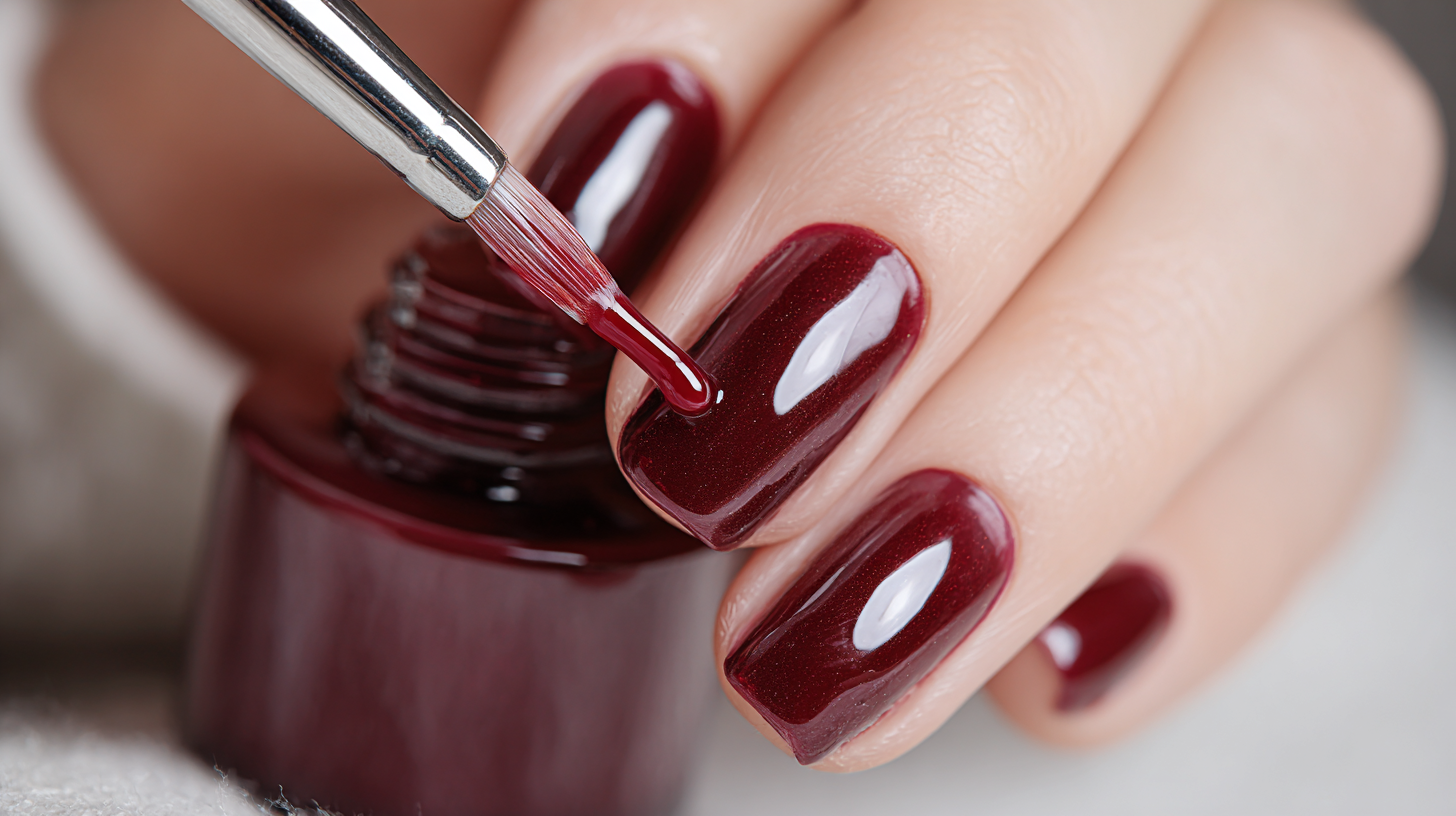
Achieving a flawless gel manicure requires a careful approach and attention to detail. Start by preparing your nails; remove any old polish, file them to your desired shape, and gently push back your cuticles. This ensures a clean base for the gel polish. Next, buff the nail surface lightly to create a smooth foundation and apply a pH-balancing solution to dehydrate the nails, which helps the gel adhere better.
Once your nails are prepped, apply a base coat evenly, making sure to seal the edges for durability. Cure the base coat under a UV or LED lamp according to the manufacturer's instructions. After this, it's time to apply the colored gel polish. Use thin layers to prevent any pooling at the edges. Cure each layer under the lamp before applying a second coat for a rich, vibrant color. Finish off with a top coat, sealing all the color and adding shine. Cure it again, and wipe any sticky residue off with a lint-free cloth soaked in alcohol. Following these steps ensures a long-lasting, salon-quality gel manicure right at home.
Common Mistakes to Avoid When Applying Gel Nail Polish
When it comes to achieving stunning results with gel nail polish, avoiding common mistakes during application can make all the difference. According to a recent report by the Nail Manufacturers Council, nearly 60% of individuals applying gel polish at home experience issues like chipping and peeling, primarily due to improper application techniques. One of the most common pitfalls is skipping the prep work, which notably includes cleansing and buffing the nails. The same report indicates that well-prepped nails can increase the longevity of gel polish wear by up to 30%.

Another frequent error is applying too thick of a coat. The International Nail Professionals Association (INPA) states that thick layers are not only more prone to lifting, but they can also lead to uneven curing, resulting in a less durable finish. Ideal application technique involves applying thin, even layers, curing each one thoroughly under a UV or LED lamp. Furthermore, it's crucial to avoid touching the cuticles or the skin, as this can lead to polish lifting and encourages potential infection. By paying attention to these details, nail enthusiasts can enhance their at-home gel application experience and achieve salon-quality results.
Tips for Long-Lasting Gel Nail Polish and Easy Removal
Applying gel nail polish at home can yield stunning results, but it requires technique and care to ensure longevity and ease of removal. To achieve long-lasting gel nails, start with a clean, dry nail bed. Use a base coat to create a smooth foundation, and apply the gel polish in thin layers to prevent uneven bulkiness and ensure faster curing under the lamp. Experts recommend using high-quality gel polishes that not only provide vibrant colors but also resist chipping, making your manicure last longer than average.
When it comes to removal, gentle practices are essential to avoid damaging your natural nails. Unlike traditional polishes, gel nails require soaking or wrapping with acetone, which can be rough on the nails if not done properly. To ease the process, consider using a moisturizing cuticle oil afterward to nourish the nails and surrounding skin. For those looking for alternatives, newer formulations, such as Japanese gel, offer longer wear and easier removal, making them a great choice for a flawless, cost-effective at-home manicure. By following these tips, you can enjoy beautiful nails that turn heads without needing salon visits.
Mastering the Art of Gel Nail Polish Application for Stunning Results
| Step |
Tip |
Duration |
Removal Method |
| 1 |
Prep your nails by trimming and filing |
10 minutes |
N/A |
| 2 |
Apply a base coat for better adhesion |
2-3 minutes |
N/A |
| 3 |
Use thin layers of gel polish |
5-10 minutes |
N/A |
| 4 |
Cure each layer under UV/LED light |
30-60 seconds |
N/A |
| 5 |
Finish with a top coat for shine |
2-3 minutes |
N/A |
| 6 |
Soak in acetone for removal |
10-15 minutes |
Acetone |
Trendy Gel Nail Art Designs to Elevate Your Look
Grey nails are emerging as a chic and versatile choice for those looking to refresh their manicure this season. Moving away from traditional neutrals, grey offers a modern twist that can complement any outfit. From sleek, minimalist designs to intricate patterns, incorporating grey into your nail art can elevate your look significantly. Pair it with delicate florals or geometric shapes for a contemporary edge that remains polished and sophisticated.
Summer also calls for softer palettes, making baby blue nails a trendy option this year. This light, breezy color captures the essence of summer and suits a variety of nail styles, whether you're opting for a classic shape or something more daring. For those who appreciate a refined aesthetic, the Kate Middleton-inspired "princess nails" trend reflects a subtle elegance that is perfect for formal occasions or casual outings alike. By experimenting with these trendy nail designs, you're sure to find the perfect manicure that showcases your personal style while staying effortlessly chic.
Gel Nail Polish Application Techniques and Popular Designs