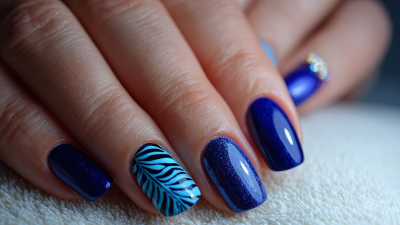
2026 How to Apply Uv Gel for Perfect Manicure at Home?
Achieving the perfect manicure at home can elevate your self-care routine. With the right techniques, using Uv Gel can transform your nails. Industry expert Dr. Lily Harper, a renowned nail technician, once said, "A great manicure begins with mastering the basics of Uv Gel application."
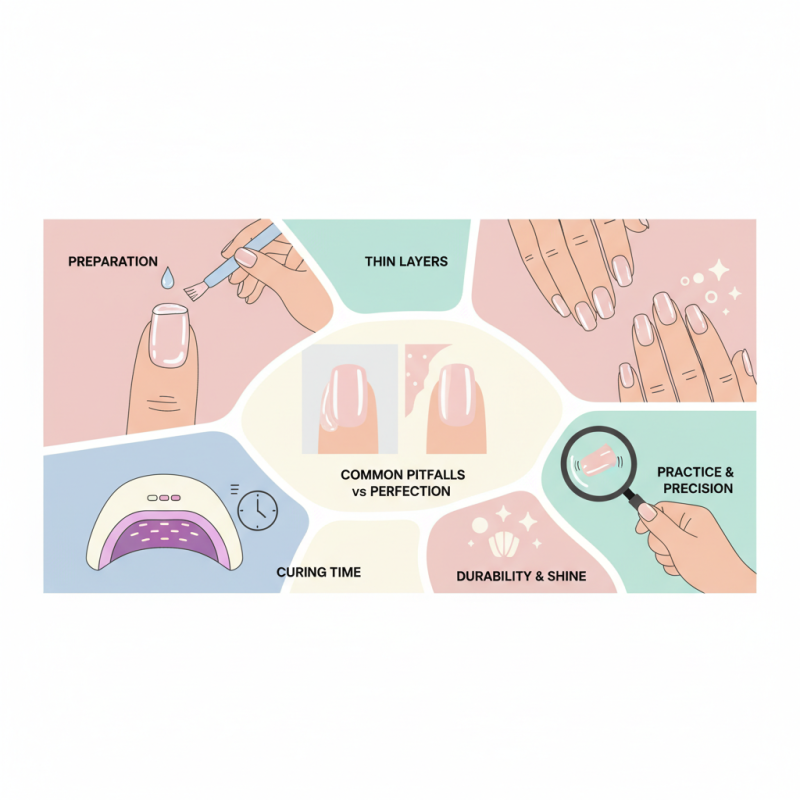
Many enthusiasts overlook the importance of preparation. Your nails should be clean and dry. Neglecting this step can lead to uneven application. Once you begin, focus on thin layers of the Uv Gel. Thick layers may cause bubbling or peeling, which can be frustrating.
Pay attention to curing times as well. Over-curing or under-curing can ruin the final look. Even small mistakes can lead to chipped nails or premature fading of the gel. Reflecting on common pitfalls is essential. Remember, practice does not make perfect; it perfects the imperfect. Uv Gel can create stunning results if done with care and precision.
Understanding UV Gel and Its Benefits for Home Manicures
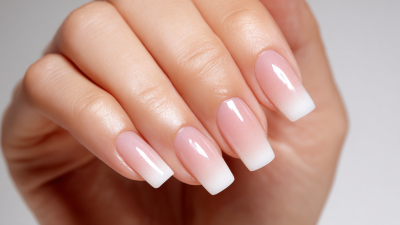
UV gel manicures have gained popularity for their long-lasting effects and glossy finish. According to industry reports, the global nail care market is projected to reach over $15 billion by 2026, with UV gel products playing a significant role. This technology allows for a more durable finish compared to traditional nail polish, making it an ideal option for home manicures. However, improper application can lead to unsatisfactory results.
Understanding UV gel is essential for achieving the perfect manicure. The gel requires a UV light to cure, which hardens the polish. Pros often emphasize that preparation is key. Skipping steps like nail buffing or cuticle removal may result in peeling or lifting. While the application process can be relaxing, it demands focus. Some users struggle with achieving an even coat, leaving streaks. Reports indicate that nearly 30% of people encounter issues in this area, highlighting the importance of practice.
The benefits of UV gel are clear, but they come with challenges. UV gel can last up to three weeks without chipping. However, removing it can be tricky. Many users face problems with stubborn residue after soaking. This often indicates that proper removal techniques were not followed. To improve, it’s recommended to invest time in learning the correct procedure rather than rushing the process. Overall, while UV gel can enhance your manicure experience, mastering it requires patience and practice.
Essential Tools and Supplies Needed for Applying UV Gel
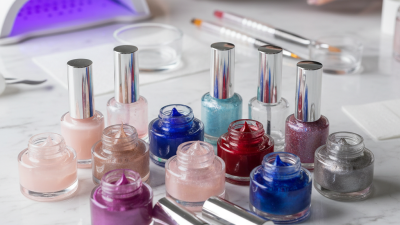
Applying UV gel for a perfect manicure at home requires some essential tools and supplies. First, you will need a UV or LED lamp that cures the gel quickly. Research shows that high-quality lamps ensure better adhesion and longevity. A nail file and buffer are crucial for prepping your nails. They help create a smooth surface, enhancing the gel's effectiveness.
Don’t forget nail cleanser and lint-free wipes. They remove oils and dust, allowing the gel to adhere properly. Cuticle pushers are important too. They help in tidying up the cuticle area for a clean finish. A base coat and top coat are vital for the durability of your manicure. Data indicates that using both can extend the life of the gel polish by up to two weeks.
Tips for a better application include ensuring your nails are completely dry before starting. Apply thin layers of gel for a smoother finish. It’s common to miss spots, so check the edges meticulously. After curing, if you notice uneven areas, just buff them lightly before adding the top coat. Remember, practice makes perfect, but imperfections are part of the learning process. Embrace each manicure, and you'll improve with time.
2026 How to Apply UV Gel for Perfect Manicure at Home? - Essential Tools and Supplies Needed for Applying UV Gel
| Tool/Supply |
Description |
Purpose |
| UV Gel |
A gel used for creating durable and glossy nails. |
To form the base of the manicure. |
| Nail File |
A tool used to shape and smooth the nails. |
To prepare the nails for gel application. |
| Base Coat |
A protective layer applied before the gel. |
To enhance adhesion and protect natural nails. |
| UV Lamp |
A lamp that cures the UV gel. |
To harden the gel and ensure durability. |
| Top Coat |
A finishing layer applied over the gel manicure. |
To provide shine and extra protection. |
| Cuticle Pusher |
A tool to push back and tidy cuticles. |
To prepare nail bed for a cleaner application. |
| Cleaning Wipes |
Wipes to clean nails before and after application. |
To remove dust and residue for better adherence. |
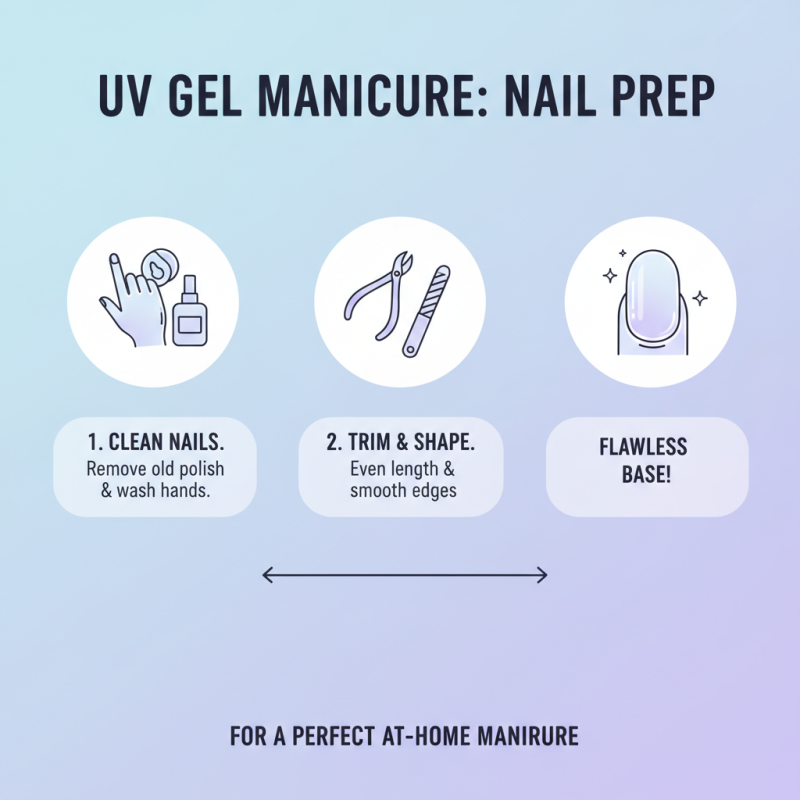
Step-by-Step Guide to Preparing Nails for UV Gel Application
Preparing your nails properly is essential for a flawless UV gel manicure at home. Start with clean nails. Remove any old polish and wash your hands thoroughly. This step ensures no residue interferes with the UV gel. Once your nails are clean, trim and shape them to your desired length. Take your time with this process; rushed cuts can lead to uneven results.
Next, gently buff the surface of your nails. This helps the gel adhere better. Use a fine buffer to avoid damaging your natural nails. Be careful not to over-buff, as this can weaken your nails. Apply a base coat to protect them. It's easy to apply too thick a layer, which can lead to lifting later on. If that happens, reflect on your technique.
After the base coat, a light coat of the UV gel can follow. It's crucial to apply it thinly and evenly. If you accidentally apply too much, it won’t cure properly. Focus on achieving a smooth finish. Don't forget to cure it under the UV lamp as directed. This ensures a durable manicure, but remember, any mistakes made during application can lead to an unsatisfactory ending. Pay attention to each step, and enjoy the process of learning and improving.
Techniques for Applying UV Gel for a Flawless Finish
Applying UV gel for a perfect manicure at home requires precision and technique. Start by prepping your nails properly. Ensure they are clean and dry. Use a nail file to shape them before application. According to a recent study, nearly 70% of home-manicure enthusiasts neglect this crucial step, leading to uneven finishes. A well-shaped nail provides a smooth canvas for the gel application.
When applying the gel, thin layers are key. Begin with a base coat, applying a small amount to each nail. Many people make the mistake of overloading the brush. This causes the gel to pool and imperfections to form. A light, even stroke is essential. Cure each layer under a UV lamp for the recommended time. Missing the curing time can result in a sticky, unmanageable finish. Remember, the industry report shows that improper curing affects the durability of the manicure significantly.
As you finish, a top coat seals the deal. However, don't rush this stage. If the previous coats were not applied evenly, the top coat will highlight these flaws. Observing the finished product in different lighting can help spot any inconsistencies. Many find it essential to reflect on each step, as perfecting the gel application is a process, not a quick fix.
Curing and Maintaining Your UV Gel Manicure at Home
Curing a UV gel manicure at home requires attention to detail. Proper curing ensures a long-lasting finish. According to a 2022 report from the Nail Industry Council, 70% of DIY manicures fail due to improper curing. This emphasizes the need for accurate exposure to UV light. Choose a UV lamp designed for gel nails. Follow the manufacturer’s instructions for optimal results. Typically, a curing time of 30 to 60 seconds under UV light is recommended.
Maintaining your UV gel manicure is equally important. Regular upkeep can prevent chips and wear. Industry data shows that proper maintenance can extend the life of your manicure by up to 30%. Seal your gel with a top coat after three to four days. Moreover, avoid using harsh chemicals on your nails. They can break down the gel. Swimming in chlorinated water may also harm your manicure. Keep a gentle cuticle oil handy. It helps maintain flexibility and shine.
Many people face challenges during application. Uneven layering can lead to bubbles. These imperfections may seem minor but can affect durability. Regular assessment of your technique is crucial. Pay attention to how much gel you apply. A thin, even layer is best. If you notice lifting, it might be time to evaluate your file and prep methods. Mistakes are part of the learning process, but they lead to improvement. Experiment and find what works best for you.