How to Apply Gel Nail Polish Like a Pro?
In the world of beauty, mastering the art of gel nail application is essential. According to renowned nail expert Jenna Smith, "Perfecting your gel nail technique can transform your beauty routine." Gel nails have become a popular choice for their long-lasting shine and durability. Yet, many struggle with application.
Achieving a salon-quality look at home can seem daunting. Reflecting on past experiences, many find themselves frustrated with chipped polish or uneven layers. It's crucial to understand that gel nails require precision and patience. Each step matters, from preparing your nails to curing the polish effectively. Small mistakes can lead to unsatisfactory results.
With the right guidance, anyone can learn to apply gel nails like a pro. Learning from experts, such as Jenna, can provide vital insights into improving techniques. Remember to embrace imperfections; they often lead to valuable lessons. With practice and the right tools, achieving flawless gel nails is within reach.
Understanding Gel Nail Polish and Its Benefits
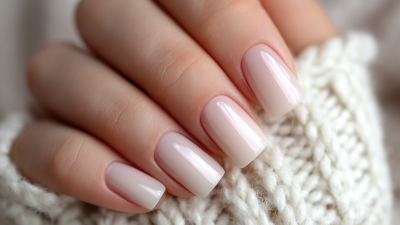
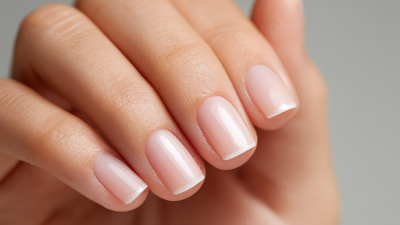
Gel nail polish has become popular for good reason. It offers a stunning finish and durability that regular nail polish often lacks. Understanding its benefits can help you appreciate why many choose gel over traditional options. Gel polish usually lasts for two weeks or longer without chipping. This longevity is perfect for those with busy lives. Additionally, the glossy finish often remains intact until you decide to remove it.
Applying gel nail polish can be tricky at first. One common mistake is applying too thick a layer. A thin coat dries faster and results in a smoother finish. It’s essential to cure each layer properly under a UV or LED lamp. If you skip this step, you may suffer from a sticky residue or uneven application. Patience is key here; rushing through can lead to mistakes.
Here are a few tips to enhance your gel application skills:
1. Start with clean, dry nails. This prevents lifting.
2. Use a base coat for better adhesion.
3. Don’t forget to cap the nail edges to extend wear time.
Your application might not be perfect initially, and that’s alright. Learn from your results. Practice makes perfect. Evaluate your technique and adjust as needed. Even pros make mistakes sometimes, so keep refining your approach.
How to Apply Gel Nail Polish Like a Pro? - Understanding Gel Nail Polish and Its Benefits
| Step |
Description |
Benefits |
| 1 |
Prep your nails by cleaning and buffing them. |
Promotes better adherence of gel polish. |
| 2 |
Apply a base coat and cure it under a UV/LED lamp. |
Creates a strong foundation for your gel color. |
| 3 |
Apply the gel color in thin layers, curing after each layer. |
Ensures even color application and durability. |
| 4 |
Finish with a top coat and cure again under the lamp. |
Adds shine and protects the design from chipping. |
| 5 |
Wipe off the tacky layer with a lint-free cloth. |
Achieves a glossy, clean finish. |
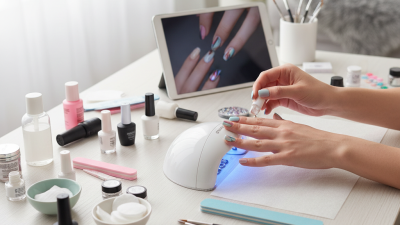
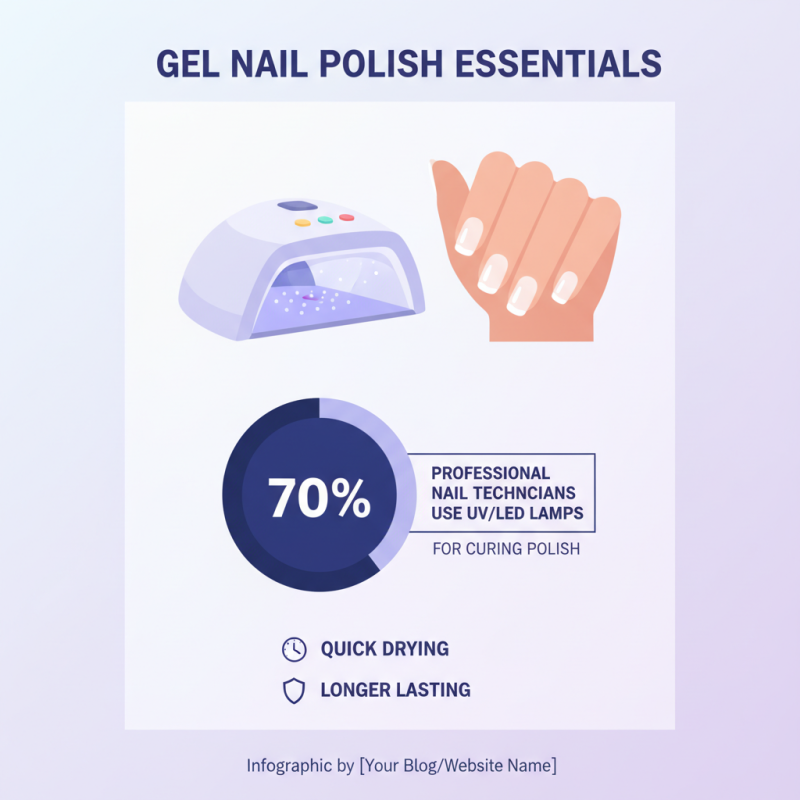
Essential Tools and Equipment for Applying Gel Nail Polish
When applying gel nail polish, having the right tools is essential. A UV or LED lamp is crucial for curing the polish. According to industry reports, about 70% of professional nail technicians use these lamps in their services. They ensure the polish dries quickly and lasts longer.
A proper nail file is equally vital. A 180-grit file works best for shaping the nails. It ensures a smooth surface for the polish application. Cuticle pushers and prep solutions help in preparing the nails. Regular cleaning and sanitization of these tools are necessary. Poor hygiene can lead to infections, affecting around 5% of nail salon clients.
Tips: Always use a base coat before applying gel polish. It protects the nails from staining. If you notice bubbles in your polish, consider your application technique. A steady hand and even strokes help avoid this. Lastly, don’t rush the curing process. Incomplete drying can lead to chipping, diminishing the polish's longevity.
Invest in high-quality tools. They make a difference in the final look. Remember, practice makes perfect. Over time, you’ll refine your technique, making the process easier and more efficient. Regularly assess your application methods to avoid common pitfalls.
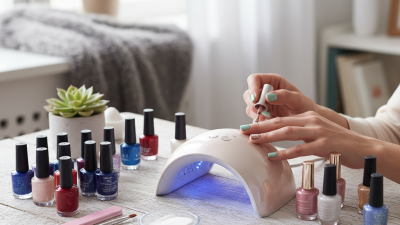
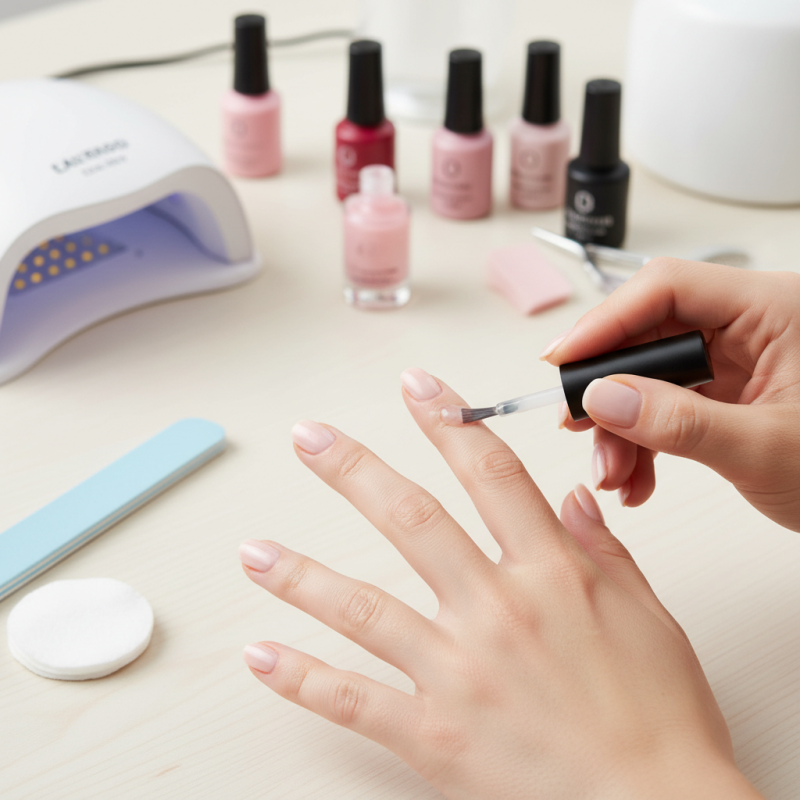
Step-by-Step Process for Perfectly Applied Gel Nail Polish
Applying gel nail polish can be daunting. But with practice, anyone can achieve salon-quality results at home. The key is in the preparation. Begin by cleaning your nails thoroughly. Remove old polish and trim your nails to the desired length. Buff the surface lightly to create a smooth base. This step is crucial; uneven surfaces can lead to clumpy applications.
Next, apply a primer. It helps the gel polish adhere better. Use a thin layer and make sure to avoid the cuticles. If the primer gets on your skin, it could cause lifting. After that, it's time for the gel polish. Apply a thin coat and cure it under a UV or LED lamp. Be mindful; thick coats can cause bubbling.
If you’re not careful, the edges will peel. Repeat the process for a second coat, ensuring even coverage. Take your time. Many rush through this step and end up with uneven color. Once done, finish with a top coat for shine. Ensure it’s even, as streaks are noticeable. Allow your nails to set completely before touching anything. Even with practice, imperfections may happen; it’s part of learning.
Tips for Curing and Finishing Your Gel Nail Polish Application
Curing gel nail polish is critical for a perfect finish. The curing process activates the polish. It's essential to follow the manufacturer's instructions for times and lamp types. You want to ensure the polish is fully cured to avoid chipping. If you rush this step, you may end up with uneven areas or bubbling.
Pay attention to your lamp. Is it strong enough? Weak lamps can lead to poor results. For a flawless finish, ensure the entire nail is under the light. It might take some practice to get used to positioning. Sometimes, I’ve noticed that I missed spots. Check after curing to see if any areas are uncured.
Finishing touches can elevate your look. A top coat is vital for shine and protection. Make sure to apply it smoothly and avoid getting it on your skin. If you do, clean up the edges before curing. Don’t skip the oil at the end. It nourishes your nails and enhances shine. Reflect on your technique after each session. Improvement comes with practice and attention to detail.
Common Mistakes to Avoid When Applying Gel Nail Polish
Applying gel nail polish can be tricky. Many people make common mistakes that can ruin the final look. One major error is not preparing the nails properly. Clean and buff the nails before applying the polish. This step helps the gel adhere better. Skipping this can lead to chipping.
Another mistake is applying the polish too thickly. A thick coat will not cure properly under the lamp. It can result in uneven surfaces or peeling. Use thin layers instead. Each layer should be light and even. Remember, patience is key here.
Lastly, don’t forget to cap the edges of the nails. This simple action helps prevent chipping. Many overlook this step, thinking it's unnecessary. However, it makes a significant difference in the longevity of the manicure. Avoid these common pitfalls and enjoy a flawless gel manicure.
Common Mistakes to Avoid When Applying Gel Nail Polish